Halloween Graveyard Cupcakes
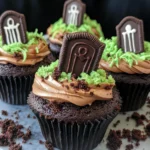
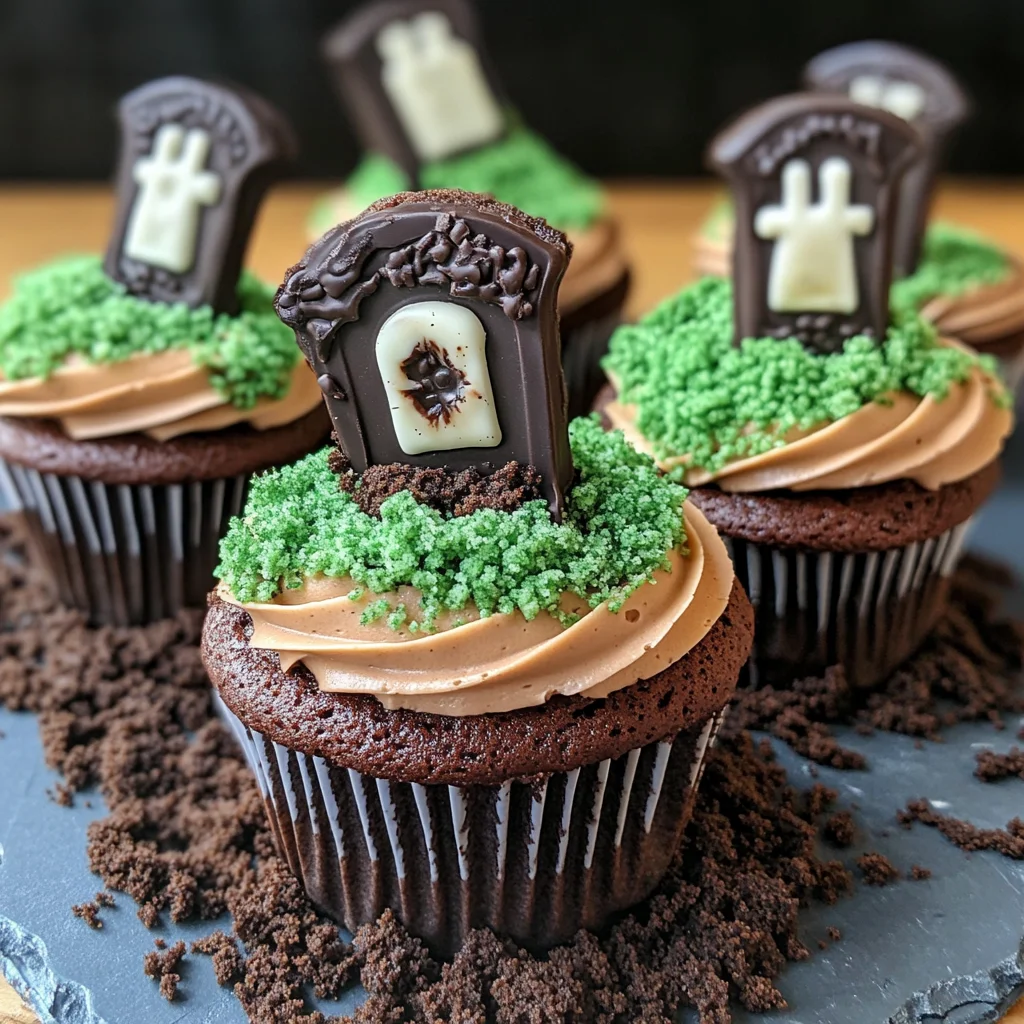
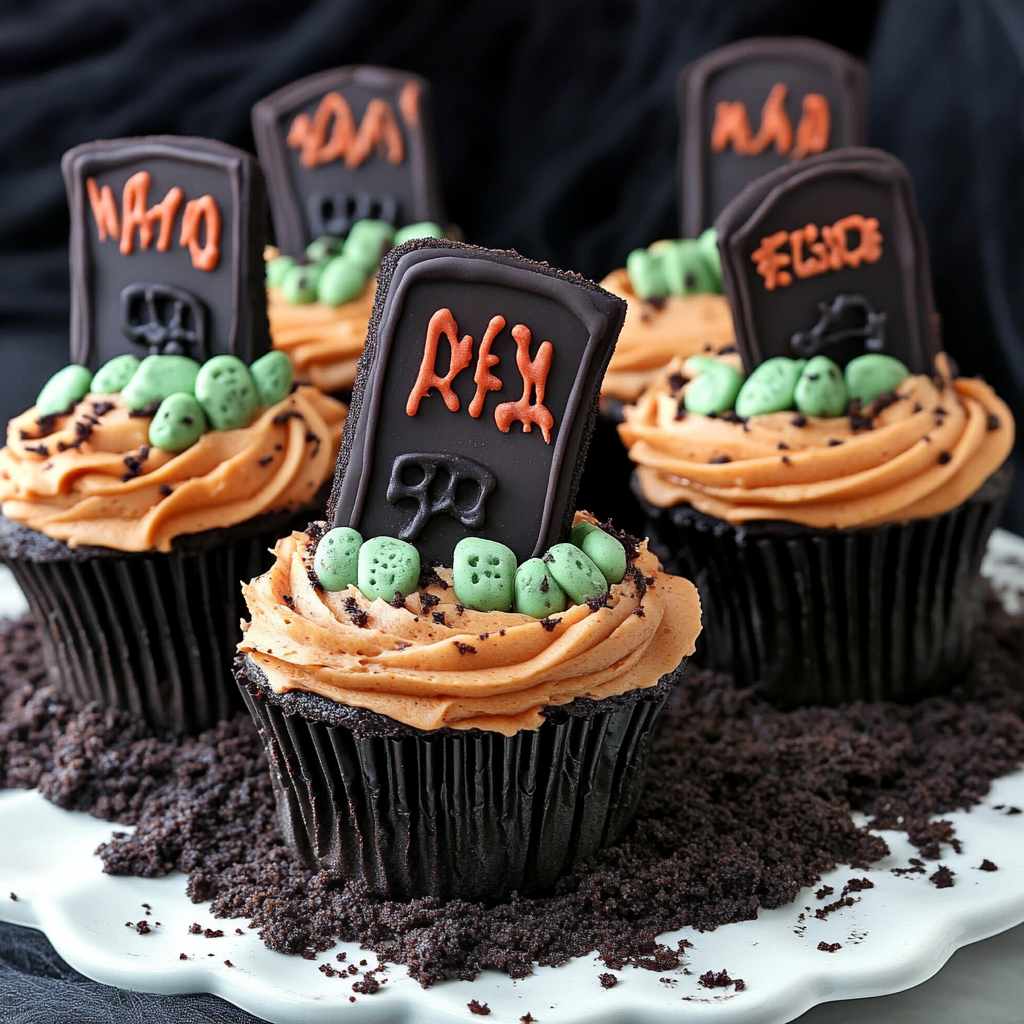
Chocolate cupcakes made to look like a graveyard, these Halloween Graveyard Cupcakes are not only festive but also delicious! With a rich Oreo cheesecake filling and decorated with chocolate buttercream, they are perfect for Halloween parties, spooky gatherings, or just a fun treat to enjoy. Their unique appearance and decadent flavors make them a standout dessert that will impress everyone.
Why You’ll Love This Recipe
- Creative Presentation: These cupcakes are designed to look like a graveyard, making them a fun addition to any Halloween celebration.
- Delicious Flavors: The combination of chocolate, Oreo, and cream cheese creates an indulgent treat that is hard to resist.
- Interactive Fun: Decorating the cupcakes allows for creativity, making it a great activity for kids and adults alike.
- Make Ahead Option: You can prepare the components in advance, saving time on the day of your event.
- Versatile Design: Customize the decorations to fit your theme or personal style!
Tools and Preparation
Before you start baking your Halloween Graveyard Cupcakes, gather the necessary tools. Having everything ready makes the process smoother.
Essential Tools and Equipment
- Cupcake tin
- Cupcake cases
- Mixing bowls
- Electric whisk or stand mixer
- Piping bags
- Palette knife
- Baking paper
Importance of Each Tool
- Cupcake tin: Ensures even baking and perfect shape for each cupcake.
- Electric whisk or stand mixer: Saves time and effort in mixing ingredients thoroughly to achieve the best texture.
- Piping bags: Allows for precise decoration of frosting and filling, enhancing presentation.
Ingredients
To create these Halloween Graveyard Cupcakes, you’ll need the following ingredients:
For the Cupcakes
- 12 Lotus biscoff biscuits
- 150 g Dark chocolate (melted)
- 30 g White chocolate (melted)
- 175 g Baking spread or butter (softened, unsalted)
- 175 g Caster sugar
- 3 Eggs (large)
- 2 tbsp Milk
- 150 g Self raising flour
- 25 g Cocoa powder
- 1/4 tsp Baking powder
For the Oreo Cheesecake Filling
- 115 g Full fat cream cheese
- 15 g Icing sugar
- 15 g Oreos (crushed)
- 1/8 tsp Vanilla extract
For the Chocolate Buttercream
- 100 g Butter (softened, unsalted)
- 165 g Icing sugar
- 35 g Cocoa powder
- 1-2 tsp Milk
For the Green Grass Buttercream
- 25 g Butter (softened, unsalted)
- 50 g Icing sugar
- 1/8 tsp Vanilla extract
- Green food colouring
- 35 g Oreos (crushed)
How to Make Halloween Graveyard Cupcakes
Step 1: Make the Biscuit Graves
Start by snapping about a third off each biscuit to create shorter gravestones. Melt the dark chocolate and dip each biscuit into it before placing them on baking paper to set.
Step 2: Decorate Biscuit Graves
Once set, melt white chocolate and transfer it into a piping bag. Pipe your desired designs on top of the biscuits and leave them to set.
Step 3: Preheat Your Oven
Preheat your oven to 140C Fan / 160C / 325F / Gas Mark 3. Line a cupcake tin with cupcake cases.
Step 4: Make the Sponge Mixture
In a large bowl, mix together softened baking spread and caster sugar using an electric whisk or stand mixer for about 5 minutes.
Step 5: Add Eggs and Milk
Add in the eggs and milk. Whisk until everything is well combined.
Step 6: Fold in Dry Ingredients
Gently fold in self-raising flour, cocoa powder, and baking powder until no dry patches remain.
Step 7: Bake the Cupcakes
Divide the batter evenly among the cupcake cases. Bake for 25-30 minutes or until a skewer comes out clean when inserted into the center. Allow them to cool completely.
Step 8: Prepare Oreo Cheesecake Filling
While cooling, prepare your filling by mixing cream cheese, icing sugar, vanilla extract until smooth. Stir in crushed Oreos.
Step 9: Core Cupcakes
Using a cupcake corer or knife, make holes in each cooled cupcake’s center.
Step 10: Fill with Cheesecake Mixture
Fill each hole with your Oreo cheesecake mixture using a spoon or small piping bag for precision.
Step 11: Make Chocolate Buttercream
In another bowl, mix together butter with cocoa powder and icing sugar. Gradually add milk until smooth.
Step 12: Create Green Grass Buttercream
Mix softened butter with icing sugar; add vanilla extract and green food coloring until desired shade is achieved.
Step 13: Decorate with Chocolate Buttercream
Pipe chocolate buttercream onto each cupcake using a round nozzle; smooth out tops with a palette knife if desired.
Step 14: Add Biscuit Gravestones
Insert one chocolate-covered biscuit gravestone into each cupcake carefully.
Step 15: Sprinkle Oreo Soil
Sprinkle crushed Oreos around each gravestone as soil decor.
Step 16: Pipe Green Grass Around Graves
Using green buttercream in piping bags fitted with multi-opening nozzles, pipe grass around each gravestone or use spoons to create texture.
Step 17: Serve Your Spooky Treats!
Store any leftovers in an airtight container in a cool place; consume within three days for optimal freshness! Enjoy your delightful Halloween Graveyard Cupcakes!
How to Serve Halloween Graveyard Cupcakes
Serving Halloween Graveyard Cupcakes can be a delightful experience that adds to the festive atmosphere. These spooky treats are perfect for parties, gatherings, or simply enjoying at home with family. Here are some creative serving suggestions.
Individual Cupcake Boxes
- Present each cupcake in a small box tied with a ribbon for a charming gift. This makes it easy for guests to take their treats home.
Halloween-Themed Plates
- Use plates decorated with Halloween motifs such as ghosts, pumpkins, or bats to enhance the spooky vibe. It adds an extra layer of fun to your dessert table.
Cupcake Stands
- Arrange the cupcakes on a multi-tiered stand to create an eye-catching display. This elevates your dessert presentation and makes it the centerpiece of your table.
Accompanying Drinks
- Pair these cupcakes with themed drinks like pumpkin spice lattes or spooky punch. This creates a complete Halloween experience for your guests.
Trick-or-Treat Bags
- Include a cupcake as part of trick-or-treat bags for children. It’s a special treat that will delight kids and make your celebration memorable.
How to Perfect Halloween Graveyard Cupcakes
Creating the ultimate Halloween Graveyard Cupcakes requires attention to detail and a few helpful tricks. Follow these tips to ensure your cupcakes are spook-tacular!
- Use Fresh Ingredients – Always opt for fresh eggs and high-quality chocolate for the best flavor and texture in your cupcakes.
- Measure Accurately – Accurate measurements ensure consistent results, so use weight measurements when possible for precise baking.
- Cool Completely – Allow the cupcakes to cool fully before decorating; this prevents melting and ensures the integrity of your designs.
- Experiment with Decorations – Get creative! Consider adding edible eyes or candy decorations to enhance the graveyard theme even further.
- Taste Test – Before serving, taste one of your creations to ensure everything is as delicious as it looks!
Best Side Dishes for Halloween Graveyard Cupcakes
Pairing side dishes with Halloween Graveyard Cupcakes can elevate your dessert experience during celebrations. Here are some fantastic options that complement these spooky treats.
- Pumpkin Soup – A warm, creamy pumpkin soup offers a savory contrast to sweet cupcakes, perfect for chilly autumn evenings.
- Spooky Veggie Platter – Arrange seasonal vegetables like carrots and cucumbers into fun shapes (like ghosts) served with a dip.
- Cheesy Garlic Breadsticks – These cheesy delights provide a comforting counterpart to the sweetness of the cupcakes.
- Halloween Fruit Salad – Mix fruits like oranges, grapes, and kiwis in playful shapes; add some spooky snacks like gummy worms for fun!
- Deviled Eggs – Create deviled eggs by adding food coloring or toppings that resemble eyeballs or monsters—making them festive!
- Mini Sausage Rolls – These bite-sized snacks are easy to grab and eat, providing protein that balances out dessert sweetness.
- Crispy Kale Chips – A healthier alternative that adds crunch while being easy to prepare ahead of time.
- Spiced Apple Cider – Serve warm spiced apple cider alongside your cupcakes for a cozy drink option that complements fall flavors perfectly.
Common Mistakes to Avoid
When making Halloween Graveyard Cupcakes, it’s easy to slip up. Here are some common mistakes to watch out for:
- Skipping the Cooling Step: Not allowing cupcakes to cool completely can ruin your frosting. Always let them cool on a wire rack for at least 30 minutes.
- Using Cold Ingredients: Cold butter or eggs can impact texture. Ensure all ingredients are at room temperature for best results.
- Overmixing the Batter: Mixing too much can lead to dense cupcakes. Mix just until combined for a lighter texture.
- Neglecting Decoration Details: Failing to add fun decorations makes your cupcakes less festive. Use Oreo soil and biscuit graves creatively!
- Not Measuring Ingredients Accurately: Incorrect measurements can alter the taste and texture. Use a kitchen scale for precision.
Storage & Reheating Instructions
Refrigerator Storage
- Store in an airtight container for up to 3 days.
- Keep in a cool place away from direct sunlight.
Freezing Halloween Graveyard Cupcakes
- Wrap each cupcake individually in plastic wrap before placing them in a freezer-safe container.
- They can be frozen for up to 3 months.
Reheating Halloween Graveyard Cupcakes
- Oven: Preheat to 350°F (175°C) and warm for about 5-10 minutes.
- Microwave: Heat one cupcake at a time for about 15-20 seconds on medium power.
- Stovetop: Not recommended as it may dry out the cupcakes.
Frequently Asked Questions
Here are some common questions regarding Halloween Graveyard Cupcakes:
Can I use different flavors of cupcakes?
Absolutely! You can experiment with vanilla or red velvet bases, adding different fillings and frostings.
How do I achieve a spooky look with the decorations?
Focus on using crushed Oreos for soil and make varied shapes with the green grass buttercream to enhance the graveyard effect.
Can I make these cupcakes gluten-free?
Yes, substitute regular flour with gluten-free all-purpose flour, and ensure all other ingredients are gluten-free.
What’s the best way to transport my Halloween Graveyard Cupcakes?
Use a cupcake carrier or box that keeps them secure and upright during transport.
How long do these cupcakes last?
Stored properly in an airtight container, they will stay fresh for up to three days in the refrigerator or three months in the freezer.
Final Thoughts
Halloween Graveyard Cupcakes are not only delicious but also visually striking! Their spooky presentation is perfect for Halloween parties or gatherings. Feel free to customize them by experimenting with different colors and decorations. Try these fun treats this season!
Halloween Graveyard Cupcakes
Create festive Halloween Graveyard Cupcakes with chocolate, cream cheese, and fun decorations! Try this spooky recipe today!
- Prep Time: 30 minutes
- Cook Time: 30 minutes
- Total Time: 1 hour
- Yield: Makes approximately 12 cupcakes 1x
- Category: Dessert
- Method: Baking
- Cuisine: American
Ingredients
- 12 Lotus biscoff biscuits
- 150 g dark chocolate (melted)
- 175 g baking spread or unsalted butter (softened)
- 175 g caster sugar
- 3 large eggs
- 2 tbsp milk
- 150 g self-raising flour
- 25 g cocoa powder
- 1/4 tsp baking powder
- 115 g full-fat cream cheese
- 15 g icing sugar
- 15 g Oreos (crushed)
- 1/8 tsp vanilla extract
- 100 g unsalted butter (softened) for frosting
- 165 g icing sugar for frosting
- 35 g cocoa powder for frosting
- 1–2 tsp milk for frosting
- 25 g unsalted butter (softened) for green grass buttercream
- 50 g icing sugar for green grass buttercream
- 1/8 tsp vanilla extract for green grass buttercream
- Green food coloring for green grass buttercream
- 35 g Oreos (crushed) for green grass buttercream
Instructions
- Preheat your oven to 140C Fan / 160C / 325F. Line a cupcake tin with cases.
- For the cupcakes, mix softened baking spread and caster sugar until fluffy. Add eggs and milk; whisk until combined. Fold in dry ingredients and bake for 25-30 minutes.
- While cooling, prepare the Oreo cheesecake filling by mixing cream cheese, icing sugar, and crushed Oreos until smooth.
- Core each cupcake and fill with the cheesecake mixture.
- Make both chocolate and green grass buttercream frostings and decorate each cupcake, inserting biscuit gravestones and sprinkling crushed Oreos as 'soil.'
Nutrition
- Serving Size: 1 serving
- Calories: 345
- Sugar: 32g
- Sodium: 140mg
- Fat: 17g
- Saturated Fat: 10g
- Unsaturated Fat: 7g
- Trans Fat: 0g
- Carbohydrates: 43g
- Fiber: 2g
- Protein: 4g
- Cholesterol: 55mg

