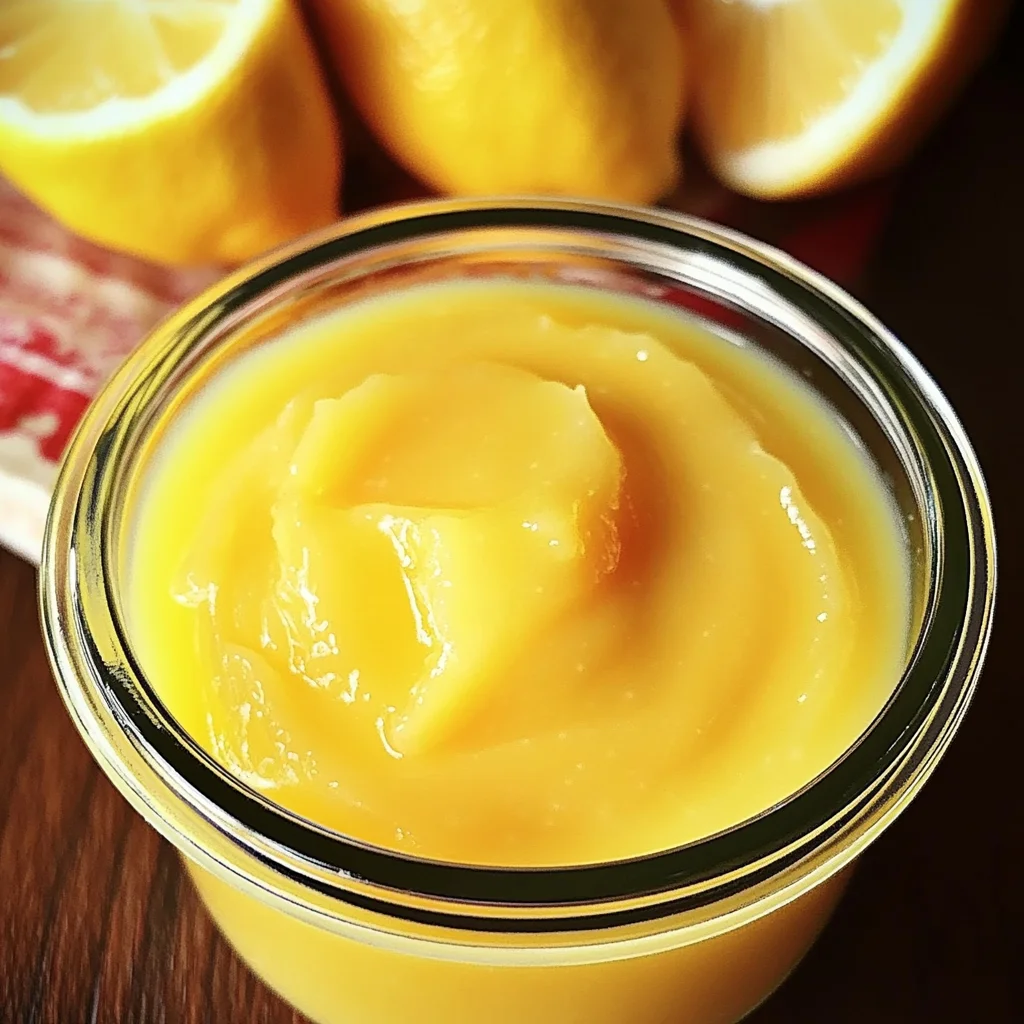
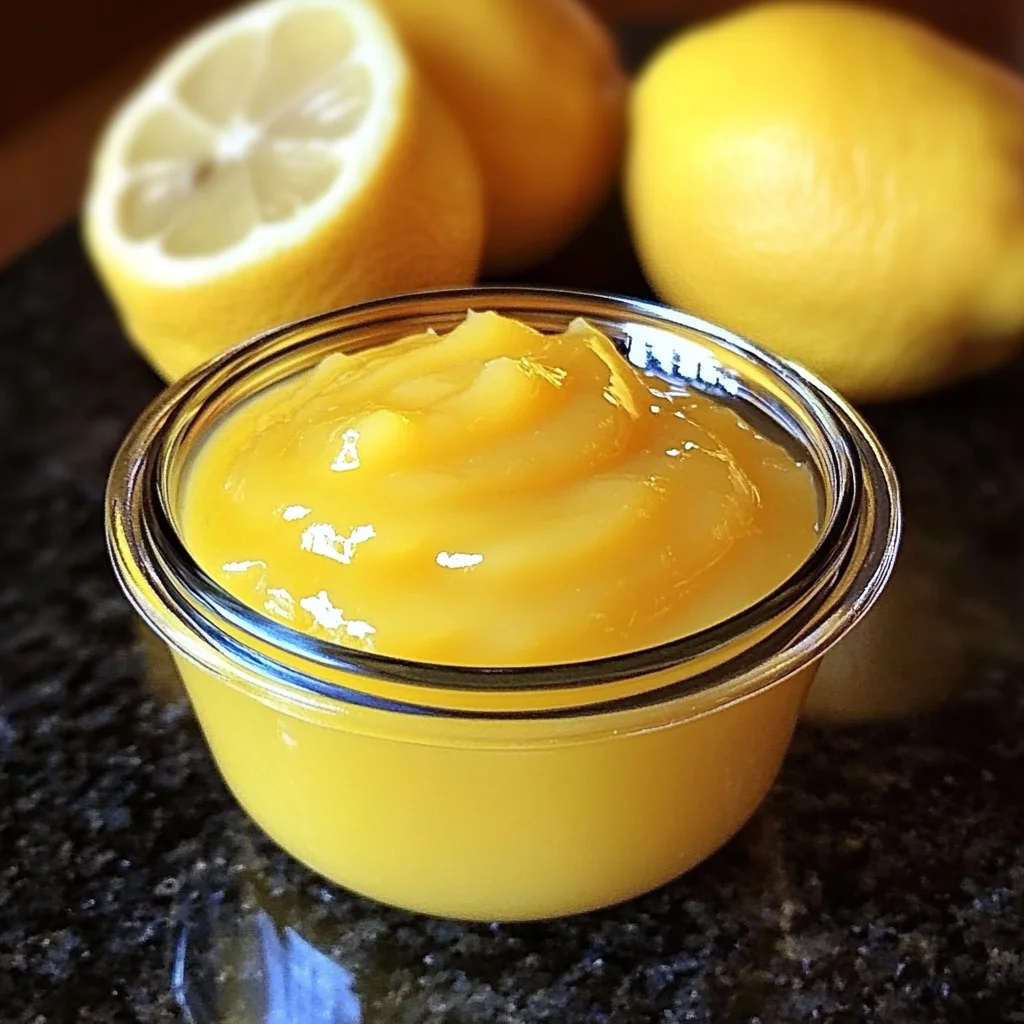
How to Make Lemon Curd
Bright, tart, and tasty, How to Make Lemon Curd is a delightful journey into the world of desserts. This homemade treat elevates any occasion, whether you’re spreading it on toast, filling pastries, or enjoying it straight from the jar. The vibrant flavor and creamy texture make it a standout addition to your dessert repertoire, proving that making lemon curd is both simple and rewarding.
Why You’ll Love This Recipe
- Quick Preparation: With just 10 minutes of prep time, you can whip up this delicious lemon curd in no time.
- Versatile Use: Enjoy it on breakfast items, in desserts, or as a filling for cakes and tarts.
- Fresh Ingredients: Using fresh lemons ensures a bright flavor that store-bought options can’t compete with.
- Culinary Adventure: Making lemon curd at home gives you control over sweetness and tanginess.
- Impressive Treat: Homemade lemon curd makes for a beautiful gift or an impressive addition to any gathering.
Tools and Preparation
Before diving into this delightful recipe, gather your tools and equipment. Having everything ready will ensure a smooth cooking process.
Essential Tools and Equipment
- Medium saucepan
- Whisk
- Measuring cups
- Measuring spoons
- Mixing bowl
Importance of Each Tool
- Medium saucepan: Essential for heating the mixture evenly without burning.
- Whisk: Helps incorporate ingredients smoothly, preventing lumps in your curd.
- Mixing bowl: Ideal for cooling your lemon curd after cooking.
Ingredients
For the Curd
- 1 c. + 2 T. granulated sugar
- 1 T. cornstarch
- 1/8 tsp. salt
- 1 c. fresh lemon juice (approximately 5 lemons)
- 3 large eggs
- 2 T. unsalted butter
- 1 tsp. grated lemon rind
How to Make How to Make Lemon Curd
Step 1: Combine Dry Ingredients
In a medium saucepan, combine the granulated sugar, cornstarch, and salt using a whisk until well mixed.
Step 2: Add Wet Ingredients
Stir in the fresh lemon juice and eggs until fully combined.
Step 3: Cook the Mixture
Bring the mixture to a boil over medium heat while stirring constantly with the whisk to prevent sticking or burning.
Step 4: Thicken the Curd
Once boiling, reduce the heat and simmer for one minute or until thickened, continuing to stir constantly.
Step 5: Finish with Butter and Rind
Remove from heat and add unsalted butter along with grated lemon rind. Stir gently until the butter has completely melted.
Step 6: Cool and Chill
Spoon the mixture into a bowl and allow it to cool slightly before covering it. Chill in the refrigerator for at least six hours or overnight; note that it will thicken further as it cools.
Now you’ve mastered how to make lemon curd! Enjoy its bright flavor in various dishes or simply savor it by the spoonful!
How to Serve How to Make Lemon Curd
Lemon curd is a versatile treat that can elevate many dishes. Whether you’re looking to enjoy it straight from the jar or incorporate it into other desserts, the possibilities are deliciously endless.
On Toast
- Spread lemon curd on warm, toasted bread for a bright breakfast or snack. It pairs well with butter for an extra creamy texture.
In Cupcakes
- Use lemon curd as a filling for lemon cupcakes. The tartness balances out the sweetness of the cake and frosting beautifully.
With Scones
- Serve lemon curd alongside freshly baked scones. It makes a delightful alternative to traditional clotted cream.
As a Dip
- Mix lemon curd with yogurt to create a refreshing dip for fruit. This combination is perfect for summer gatherings.
In Tarts
- Fill tart shells with lemon curd for a classic dessert. Top with fresh berries for added flavor and color.
Over Ice Cream
- Drizzle lemon curd over vanilla ice cream for a zesty twist. The warmth of the ice cream will slightly melt the curd, creating a heavenly dessert.
How to Perfect How to Make Lemon Curd
Perfecting your homemade lemon curd can take it from good to great. Here are some helpful tips to ensure your curd turns out smooth and flavorful.
-
Use fresh lemons: Freshly squeezed lemon juice makes all the difference in flavor compared to bottled juice.
-
Whisk continuously: While cooking, keep whisking consistently to prevent the eggs from scrambling and ensure even thickening.
-
Strain if needed: If you notice any lumps after cooking, strain the mixture through a fine sieve for a silky texture.
-
Store properly: Keep your lemon curd in an airtight container in the refrigerator to maintain its freshness and flavor.
Best Side Dishes for How to Make Lemon Curd
Lemon curd can complement a variety of side dishes, enhancing both sweet and savory meals. Here are some excellent options:
-
Shortbread Cookies: Buttery shortbread cookies pair perfectly with tangy lemon curd, creating a delightful contrast in flavors.
-
Fresh Fruit Salad: A colorful fruit salad served with a dollop of lemon curd adds brightness and zest to every bite.
-
Cheesecake: A slice of creamy cheesecake topped with lemon curd brings a refreshing citrus note that cuts through the richness.
-
Pavlova: This airy meringue dessert topped with whipped cream and lemon curd offers a light yet satisfying option for any occasion.
-
Pancakes: Drizzle warm pancakes with lemon curd instead of syrup for a unique breakfast twist that brightens your morning routine.
-
Coconut Macaroons: These chewy coconut treats are enhanced by the tanginess of lemon curd, making them an irresistible pairing.
Common Mistakes to Avoid
Making Lemon Curd is simple, but a few mistakes can ruin the texture and flavor. Here are some common pitfalls to watch out for.
-
Skipping the whisking: If you don’t whisk constantly while cooking, the eggs may scramble instead of creating a smooth curd. Always stir vigorously to ensure a creamy consistency.
-
Using bottled lemon juice: Bottled lemon juice lacks the fresh flavor of real lemons. Always opt for freshly squeezed lemon juice for the best taste in your Lemon Curd.
-
Overheating the mixture: Cooking at too high a temperature can cause the curd to become grainy. Keep the heat medium and be patient as it thickens.
-
Not allowing it to cool properly: Skipping the cooling time can result in a runny consistency. Let it chill in the fridge for at least 6 hours to achieve that perfect thickness.
-
Forgetting to strain: If you don’t strain your curd before chilling, any lumps from cooked egg whites will remain. Use a fine-mesh sieve for a silky-smooth texture.
Storage & Reheating Instructions
Refrigerator Storage
- Store in an airtight container.
- It can last up to 1 week in the fridge.
- Make sure to label with the date you made it.
Freezing How to Make Lemon Curd
- Freeze in small, airtight containers.
- It can last up to 3 months in the freezer.
- Leave some space in containers for expansion during freezing.
Reheating How to Make Lemon Curd
- Oven: Preheat to low heat and place covered curd in an oven-safe dish until warm.
- Microwave: Heat in short bursts of 15-20 seconds, stirring between each burst until warmed through.
- Stovetop: Place over low heat, stirring frequently until just warmed; do not let it boil.
Frequently Asked Questions
If you’re curious about making Lemon Curd, here are some common questions answered.
How to Make Lemon Curd without eggs?
You can substitute eggs with silken tofu blended until smooth. This will give you a creamy texture similar to traditional Lemon Curd.
What can I use Lemon Curd for?
Lemon Curd is versatile! Use it as a filling for pastries, spread on toast, or swirl into yogurt for added flavor.
Can I make Lemon Curd with other citrus fruits?
Absolutely! Try using lime or orange juice for different flavors while following the same recipe process.
How long does homemade Lemon Curd last?
Homemade Lemon Curd lasts about 1 week in the refrigerator if stored properly in an airtight container.
Final Thoughts
Homemade Lemon Curd is bright and tangy, perfect for various desserts or simply enjoyed on its own. It’s easy to customize with different citrus fruits or add herbs for unique flavors. Give this recipe a try and enjoy its delightful versatility!
How to Make Lemon Curd

Bright, tangy, and irresistibly creamy, homemade lemon curd is a delightful addition to any dessert table. This simple recipe allows you to create a vibrant lemon spread that can elevate everything from breakfast toast to elegant pastries. With just a handful of fresh ingredients and minimal preparation time, you’ll be amazed at how easy it is to whip up this refreshing treat. Whether enjoyed directly from the jar or incorporated into your favorite desserts, homemade lemon curd is sure to impress friends and family alike.
- Prep Time: 10 minutes
- Cook Time: 10 minutes
- Total Time: 20 minutes
- Yield: About 12 servings 1x
- Category: Dessert
- Method: Cooking
- Cuisine: American
Ingredients
- 1 cup + 2 tablespoons granulated sugar
- 1 tablespoon cornstarch
- 1/8 teaspoon salt
- 1 cup fresh lemon juice (about 5 lemons)
- 3 large eggs
- 2 tablespoons unsalted butter
- 1 teaspoon grated lemon rind
Instructions
- In a medium saucepan, whisk together the sugar, cornstarch, and salt until well combined.
- Stir in the fresh lemon juice and eggs until fully mixed.
- Cook the mixture over medium heat, stirring constantly with a whisk until it reaches a boil.
- Reduce heat and let it simmer for about one minute or until thickened while continuing to stir.
- Remove from heat and mix in the unsalted butter and grated lemon rind until melted.
- Allow the mixture to cool slightly before transferring it to a bowl. Cover and refrigerate for at least six hours or overnight to achieve desired thickness.
Nutrition
- Serving Size: 30g
- Calories: 100
- Sugar: 13g
- Sodium: 5mg
- Fat: 3g
- Saturated Fat: 2g
- Unsaturated Fat: 1g
- Trans Fat: 0g
- Carbohydrates: 17g
- Fiber: 0g
- Protein: 1g
- Cholesterol: 35mg