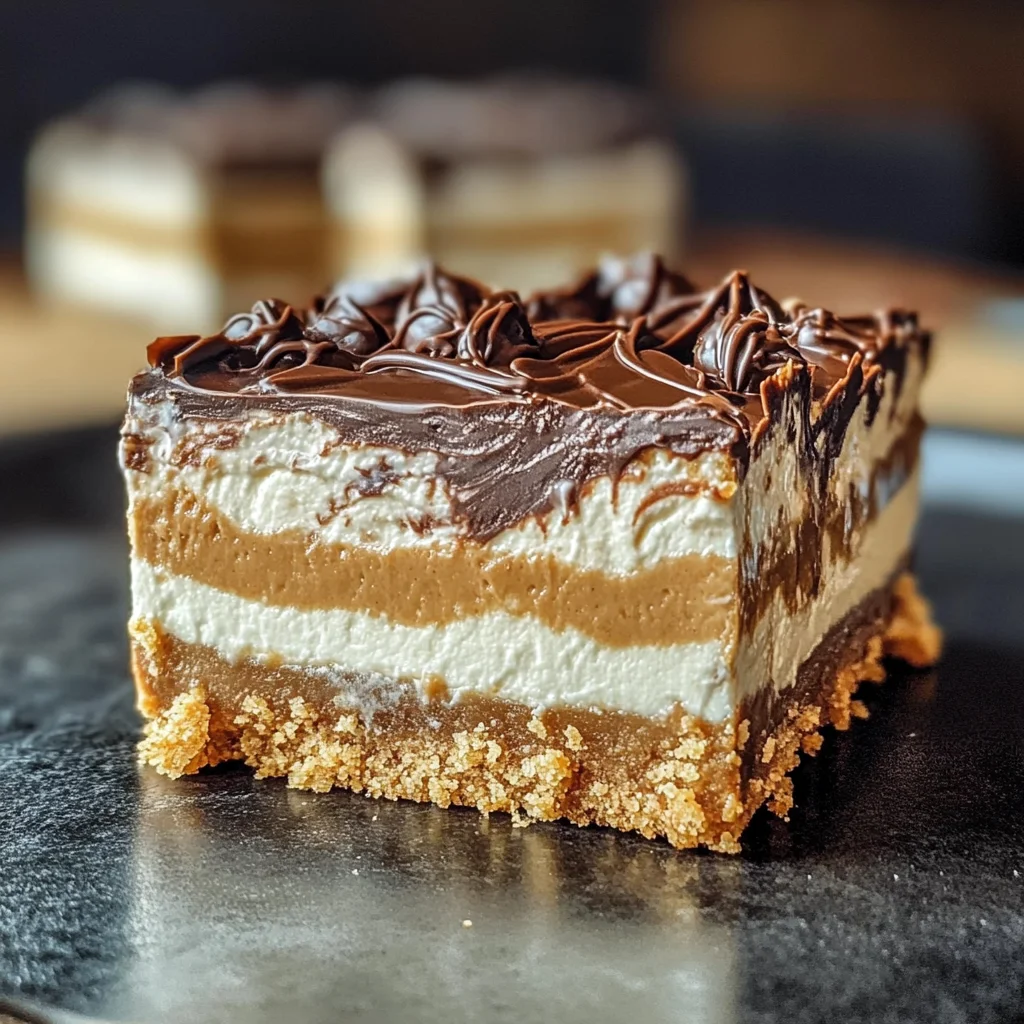
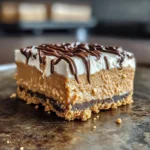
No Bake Peanut Butter Cheesecake Bars
Craving a sweet treat without the hassle of baking? Discover the joy of No Bake Peanut Butter Cheesecake Bars! These delicious layers of creamy peanut butter cheesecake on a crunchy graham cracker crust are perfect for any occasion. Easy to make with minimal ingredients, they are a hit at gatherings or a delightful reward for yourself after a long day. Add an optional chocolate drizzle for an extra touch of indulgence. Try this simple dessert today and impress everyone with your culinary skills!
Why You’ll Love This Recipe
- Quick and Easy: No baking required means you can whip these up in no time.
- Decadent Flavor: Rich peanut butter combined with creamy cheesecake is simply irresistible.
- Versatile Dessert: Perfect for parties, potlucks, or just a cozy night in.
- Minimal Ingredients: With just a few simple items, you can create something amazing.
- Customizable Toppings: Add chocolate drizzle, nuts, or fruits to elevate your bars.
Tools and Preparation
Before you start making your No Bake Peanut Butter Cheesecake Bars, gather the necessary tools to ensure a smooth process.
Essential Tools and Equipment
- Mixing bowl
- Electric mixer
- 9×9 inch baking dish
- Spatula
Importance of Each Tool
- Mixing bowl: Essential for combining all your ingredients evenly.
- Electric mixer: Helps achieve that light and creamy texture quickly.
- 9×9 inch baking dish: The perfect size for cutting the bars into manageable pieces.
- Spatula: Ideal for spreading the cheesecake layer smoothly over the crust.
Ingredients
For the Crust
- Graham crackers
- Butter
For the Peanut Butter Cheesecake Filling
- Cream cheese
- Peanut butter
- Powdered sugar
- Vanilla extract
- Heavy cream
How to Make No Bake Peanut Butter Cheesecake Bars
Step 1: Prepare the Crust
- Crush the graham crackers in a mixing bowl until fine crumbs form.
- Melt the butter, then mix it into the crushed graham crackers until well combined.
- Press this mixture firmly into the bottom of a 9×9 inch baking dish to form an even crust.
Step 2: Make the Peanut Butter Cheesecake Filling
- In another mixing bowl, beat together the cream cheese, peanut butter, and powdered sugar until smooth and creamy.
- Add in the vanilla extract, mixing until fully incorporated.
- In a separate bowl, whip the heavy cream until soft peaks form.
- Gently fold the whipped cream into the peanut butter mixture until well combined.
Step 3: Assemble the Bars
- Pour the peanut butter cheesecake filling over the prepared crust in your baking dish.
- Spread it evenly using a spatula to ensure every bite is delicious.
Step 4: Chill and Serve
- Cover with plastic wrap and refrigerate for at least 4 hours, or overnight if possible.
- Once set, cut into bars and drizzle with chocolate if desired before serving.
Enjoy your delightful homemade No Bake Peanut Butter Cheesecake Bars, perfect for satisfying any sweet tooth!
How to Serve No Bake Peanut Butter Cheesecake Bars
No Bake Peanut Butter Cheesecake Bars are not only tasty but also versatile when it comes to serving. Whether you’re hosting a party or enjoying a quiet night in, these bars can be served in many delightful ways.
Individual Portions
- Cut into Squares: Slice the cheesecake into bite-sized squares for easy serving at gatherings.
- Mini Cups: Use cupcake liners to create mini cheesecake cups for a fun presentation.
Toppings
- Chocolate Drizzle: Add a rich chocolate drizzle on top for an extra layer of flavor.
- Chopped Nuts: Sprinkle chopped peanuts or almonds for added crunch and texture.
Serving Suggestions
- With Fresh Fruit: Serve alongside fresh berries or banana slices to complement the creamy texture.
- On a Dessert Platter: Arrange the bars on a platter with other desserts for an appealing dessert spread.
How to Perfect No Bake Peanut Butter Cheesecake Bars
Making perfect No Bake Peanut Butter Cheesecake Bars requires attention to detail. Follow these tips to elevate your dessert game.
- Chill Thoroughly: Ensure the cheesecake bars chill for at least 4 hours to set properly before serving.
- Use Room Temperature Ingredients: Let cream cheese and peanut butter reach room temperature for smoother mixing.
- Adjust Sweetness: Taste the mixture before setting; feel free to add more sweetener if desired.
- Opt for Quality Ingredients: High-quality peanut butter and cream cheese enhance the overall flavor of your cheesecake bars.
Best Side Dishes for No Bake Peanut Butter Cheesecake Bars
Pairing side dishes with No Bake Peanut Butter Cheesecake Bars can enhance your dessert experience. Here are some delicious options:
- Fresh Berry Salad: A refreshing mix of strawberries, blueberries, and raspberries that balances sweetness with tartness.
- Chocolate-Covered Strawberries: Indulgent treats that bring extra richness alongside the creamy cheesecake.
- Vanilla Ice Cream: A classic pairing that adds creaminess and contrast in temperature.
- Fruit Smoothie: Blend up a fruity smoothie as a refreshing drink to complement your dessert.
- Coconut Whipped Cream: Replace traditional whipped cream with this dairy-free option for a light touch.
- Granola Clusters: Crunchy granola clusters provide texture and a wholesome element alongside the bars.
Common Mistakes to Avoid
Making No Bake Peanut Butter Cheesecake Bars is simple, but a few common mistakes can hinder your results.
- Bold crust: Using the wrong type of crust can lead to a soggy texture. Stick with graham cracker crumbs for the perfect crunch.
- Bold measurement errors: Not measuring ingredients accurately can throw off the balance of flavors. Use precise measurements for success.
- Bold mixing technique: Overmixing the peanut butter filling can make it too dense. Mix just until combined for a light and creamy texture.
- Bold cooling time: Cutting the bars too soon may result in messy slices. Allow them to chill in the refrigerator for at least four hours before serving.
- Bold topping choices: Skipping toppings can make your bars less appealing. Consider adding crushed nuts or a chocolate drizzle for enhanced flavor and presentation.
Storage & Reheating Instructions
Refrigerator Storage
- Store your No Bake Peanut Butter Cheesecake Bars in an airtight container.
- They can last up to 5 days in the refrigerator.
Freezing No Bake Peanut Butter Cheesecake Bars
- Wrap individual bars tightly in plastic wrap or foil.
- Place them in a freezer-safe bag or container; they will keep well for up to 3 months.
Reheating No Bake Peanut Butter Cheesecake Bars
- Oven: Preheat to 350°F (175°C) and warm for about 5-10 minutes. Monitor closely to avoid melting.
- Microwave: Heat on low power for 15-20 seconds until slightly warm, checking frequently.
- Stovetop: Place in a non-stick pan over low heat, turning gently until warmed through.
Frequently Asked Questions
Here are some common questions regarding No Bake Peanut Butter Cheesecake Bars.
Can I use almond butter instead of peanut butter?
Yes, feel free to substitute almond butter for a different flavor profile while maintaining similar textures.
How do I make these bars gluten-free?
Simply use gluten-free graham crackers or alternative crusts made from gluten-free oats or nuts.
How long do No Bake Peanut Butter Cheesecake Bars last?
They last up to 5 days in the refrigerator and up to 3 months in the freezer if stored properly.
Can I add chocolate to my No Bake Peanut Butter Cheesecake Bars?
Absolutely! A chocolate drizzle or layer mixed into the filling adds delicious richness and visual appeal.
What can I use instead of cream cheese?
For a lighter option, consider using Greek yogurt or silken tofu blended until smooth as an alternative.
Final Thoughts
No Bake Peanut Butter Cheesecake Bars are a delightful treat that’s both easy to make and satisfying. Their creamy texture paired with a crunchy base makes them perfect for gatherings or enjoying at home. Feel free to customize with various toppings like fruits, nuts, or drizzles to suit your taste!
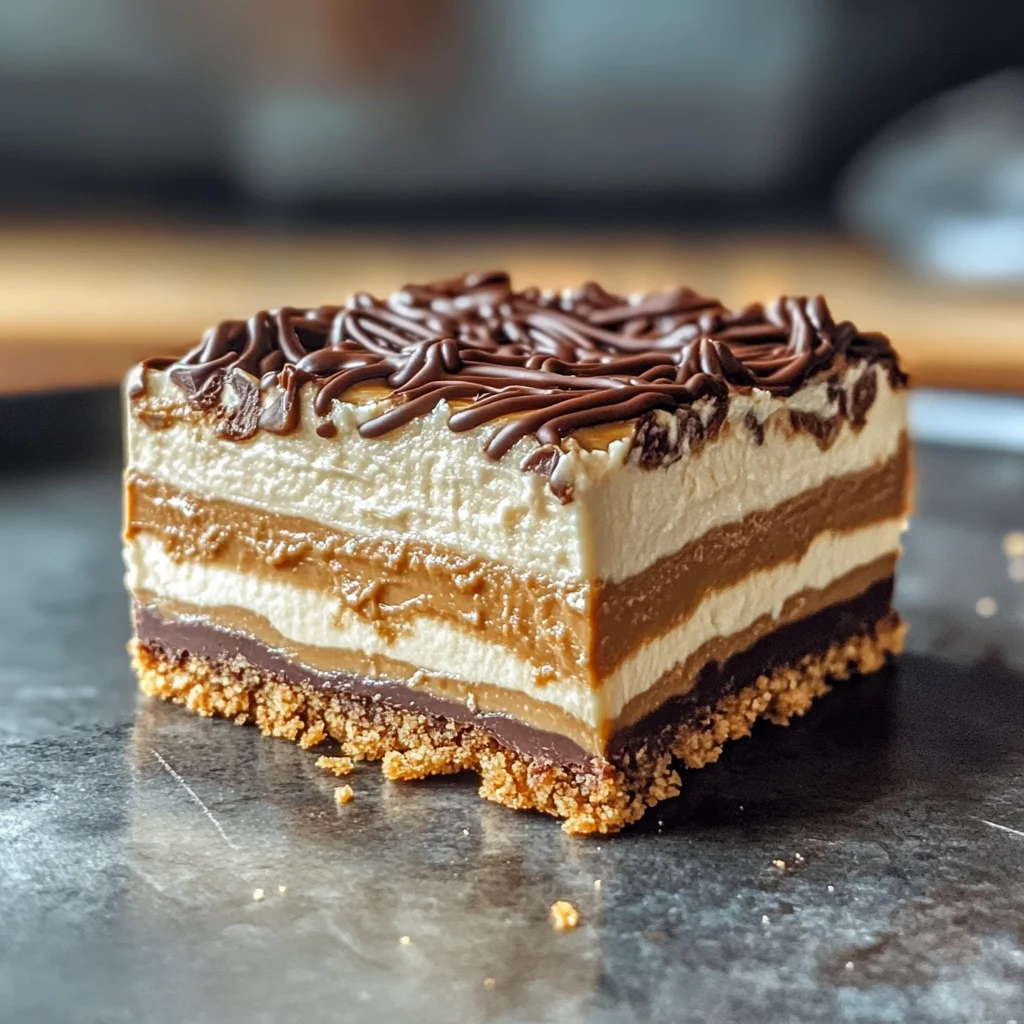
No Bake Peanut Butter Cheesecake Bars
Craving a sweet treat without the hassle of baking? Indulge in these No Bake Peanut Butter Cheesecake Bars, where creamy peanut butter meets a crunchy graham cracker crust. This delightful dessert is perfect for any occasion, from gatherings to quiet nights at home. With minimal ingredients and easy preparation, you’ll impress everyone with your culinary skills. Drizzle with chocolate for an extra touch of decadence, or enjoy them plain—the choice is yours! Enjoy the rich flavors and creamy texture of this no-bake delight that satisfies your sweet tooth effortlessly.
- Prep Time: 20 minutes
- Cook Time: None
- Total Time: 0 hours
- Yield: Approximately 9 servings
- Category: Dessert
- Method: No-bake
- Cuisine: American
Ingredients
- Graham crackers
- Butter
- Cream cheese
- Peanut butter
- Powdered sugar
- Vanilla extract
- Heavy cream
Instructions
- Prepare the crust by crushing graham crackers in a mixing bowl until fine crumbs form. Melt butter and combine with crushed graham crackers, then press firmly into the bottom of a 9×9 inch baking dish.
- For the filling, beat cream cheese, peanut butter, and powdered sugar in another bowl until smooth. Add vanilla extract and mix well. In a separate bowl, whip heavy cream until soft peaks form, then gently fold it into the peanut butter mixture.
- Pour the cheesecake filling over the prepared crust and spread evenly with a spatula.
- Cover with plastic wrap and refrigerate for at least 4 hours or overnight until set. Cut into bars and drizzle with chocolate if desired before serving.
Nutrition
- Serving Size: 1 serving
- Calories: 250
- Sugar: 15g
- Sodium: 150mg
- Fat: 18g
- Saturated Fat: 8g
- Unsaturated Fat: 10g
- Trans Fat: 0g
- Carbohydrates: 20g
- Fiber: 1g
- Protein: 5g
- Cholesterol: 30mg